
In this section we will
learn how to add effects to our footage from the effects & presets
panel, use the effect controls, how to animate some basic shapes using
different types of keyframes and some important features like parenting
and motion blur. In the chart below you can see a listing of the
steps explained in this Tutorial:
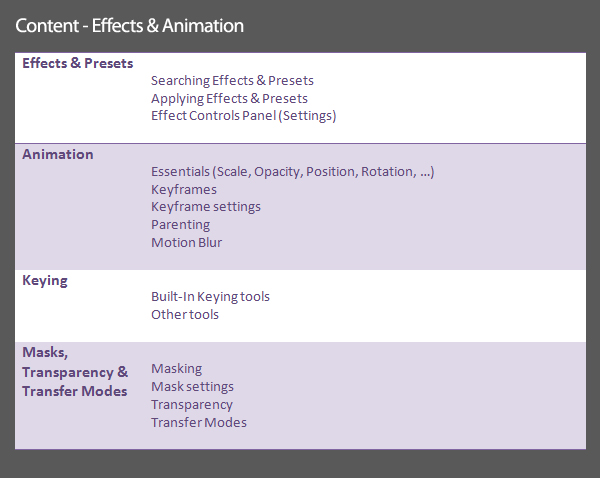


1. Effects & Presets
- Searching Effects & Presets
- Applying Effects & Presets
- Effect Controls Panel (Settings)
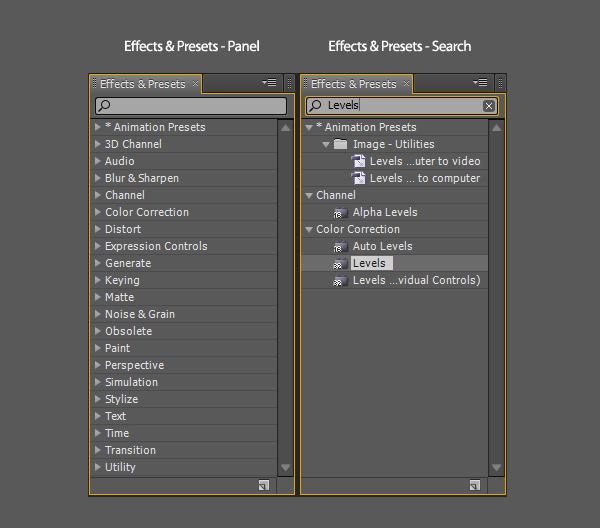
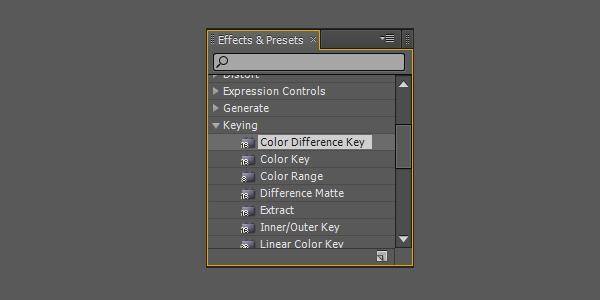
Searching Effects and Presets
The best way to find an effect or preset is the Effects & Presets Panel. By using the search bar you can find and apply Effects and Presets.Applying Effects & Presets – Drag&Drop
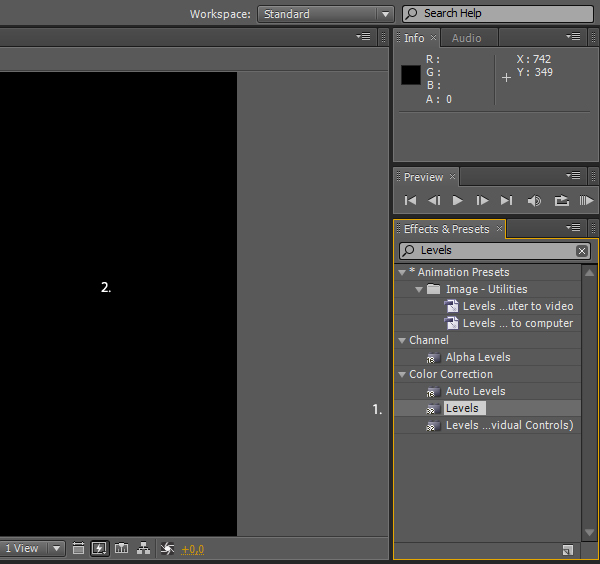
After you found one in the Effects & Presets Panel you can simply drag and drop (1.) it to the footage in the Composition Panel (2.).Applying Effects & Presets – Right-click
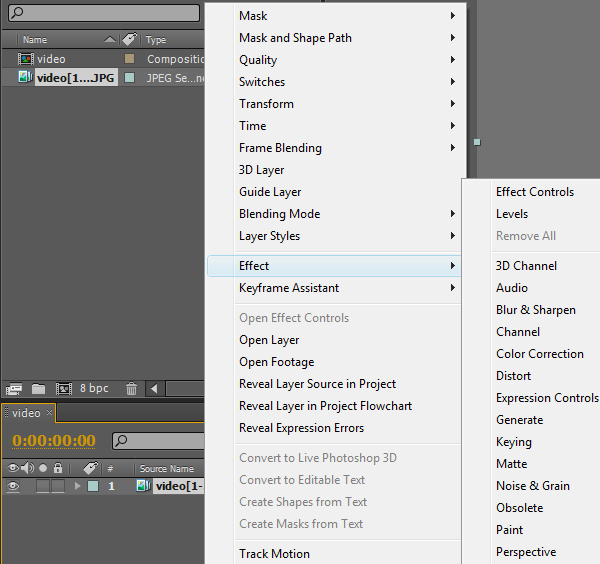
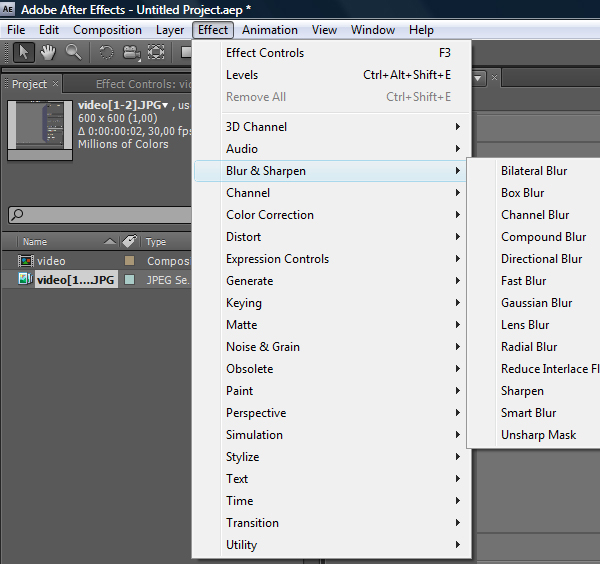
Another way of applying an Effect is by Right-clicking the Layer and then going to Effect to choose the Effect.Applying Effects & Presets – Menu bar
This time go to Effect > and select an Effect you like. Various features in After Effects are selectable via this three ways.Effect Controls Panel
After applying an Effect the Effect Controls Panel will appear next to the Project Panel. In this Panel the Effects you choose will be listed. You can modify the values like the Histogramm (1.) or the Input and Output Colors. Every Effect comes with its editable values and you should experiment until you find something pleasant. The outcome will change when changing the order of effects. The little fx-Sign enables or disables the applied effect.2. Animation
Creating an Animation is the main reason why we use After Effects. In this step we will learn the basics of the following:- Essential Transform Controls (Position, Opacity, Scale, Rotation, Anchorpoint)
- Keyframes
- Keyframe Settings
- Parenting
- Motion Blur
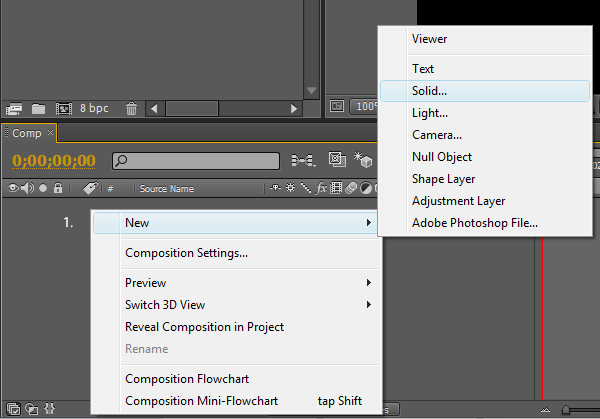
New Solid
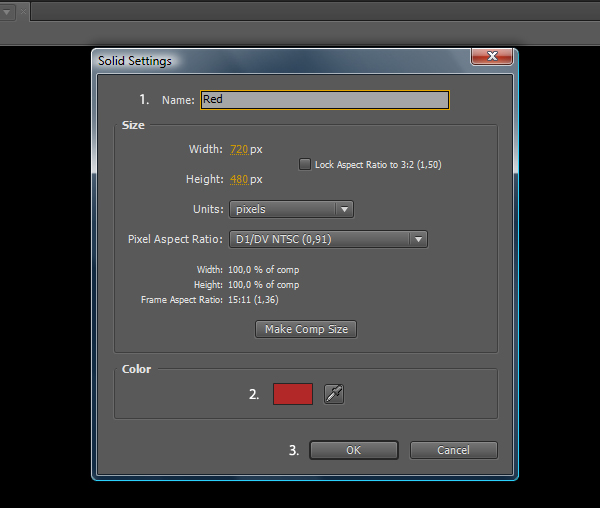
Create a new composition and then create a new Solid Layer. Right-click in Layers area > New > Solid. The Solid Settings will appear.Settings
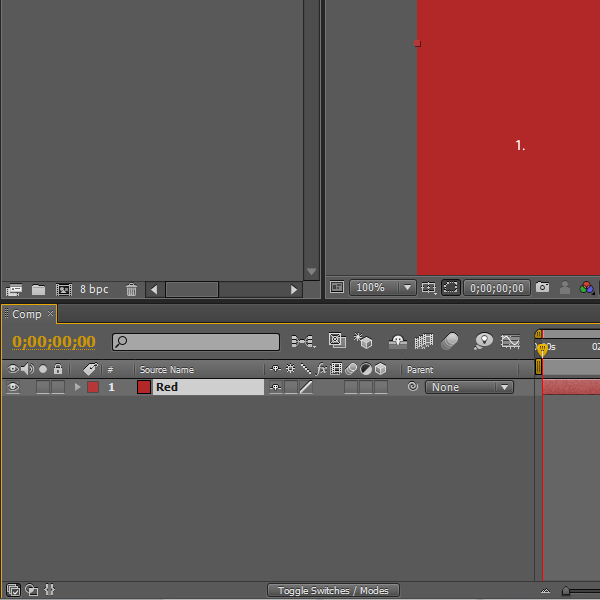
Give it a name (1.), set the size of the Solid Layer or choose Make Comp Size and give it a color you like (2.). Click on OK.New Solid Layer
Now you can see a new layer called “Red” and the Rectangular Shape in the Composition Panel (1.).Position
One of the Transform Controls in After Effects is the Position. By selecting a layer and hitting P the Position will pop up. The numbers next to it are the X and Y values which relate to the left and top of the composition. The values show the distance between the Anchor Point of our Square and the left and top of the Composition. You can actually let After Effects calculate by entering, for example: 360/2.Opacity
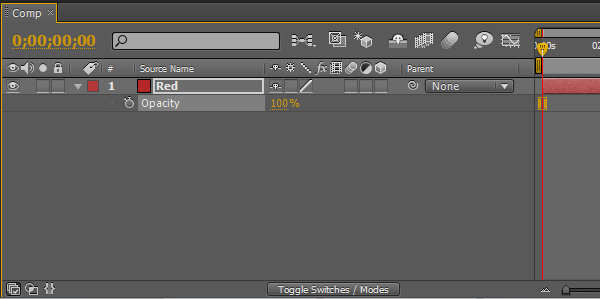
By selecting a layer and hitting T the Opacity will pop up. It’s the only Shortcut which is not beginning with the first Letter. You can change the Opacity from 100% which means the footage is opaque to 0% which means the footage is transparent.Scale
Another Transform Control you should know is the Scale which is selectable by hitting S. The Scale is also modifiable between 100% which means full size and 0% which means its gone.Rotation
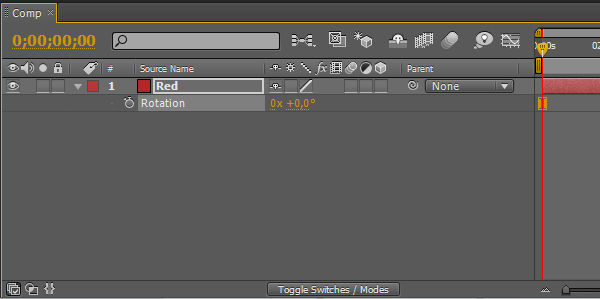
By hitting R the Rotation will pop up. The value on the right side is the degree you rotated your footage. After rotating more than 360 degree the left side will change to 1. Which shows a full rotation. By entering 3 the footage will rotate 3 times.Anchor Point
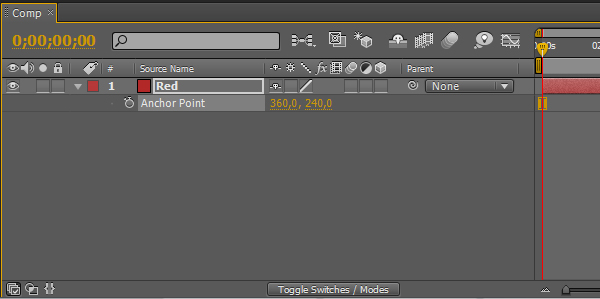
The Anchor Point is selectable by hitting A. It is the geometric reference and rotation center point of a layer. You can change the anchor point to the corner of a rectangle or wherever you want it to be. By doing that the Rotation will change since it normally rotates around the Anchor Point. As you can see the values are the same as the Position values of our Square.Selecting multiple Transform Controls
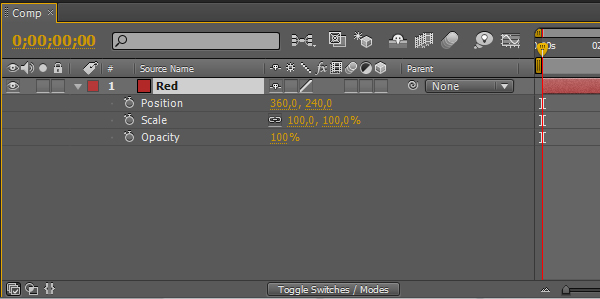
Often times you want to change more than one of the Transform Controls. For example the Position, Scale and Opacity at the same time. When hitting P the Position will pop up as we know. By hitting S the Position will disappear and the Scale will pop up. To select them and be able to change their values at the same time you have to hit the Shortcuts combined with the Shift key (hold it). Shift+P+A+T will do the following.Keyframes – Scale
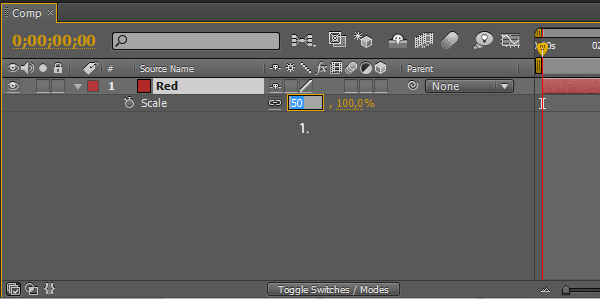
We’ve learned how to open up this controls and now we want to animate our Square. Select the Layer > hit the letter S > change the value to 50% (1.) and hit Return.Keyframes – Overview
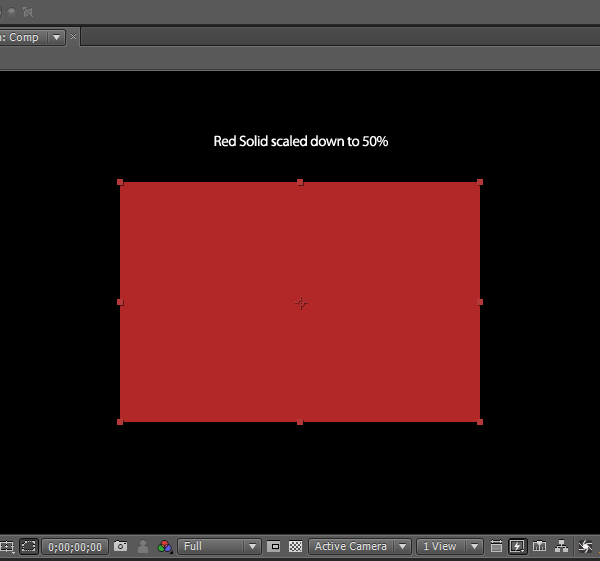
This is how our Square looks after scaling it down to 50%. In the center of our Square you can see the Anchor Point. If you take a look at the Position values you can see that although we changed our size the position didn’t change since it refers to the Anchor Point.Keyframes – Stopwatch
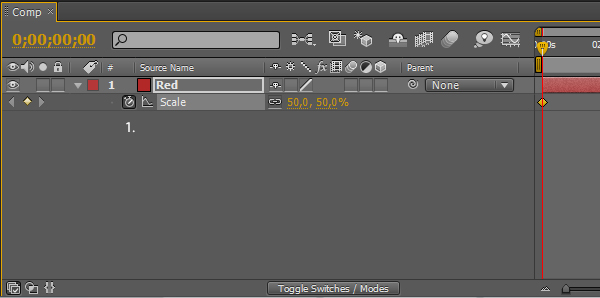
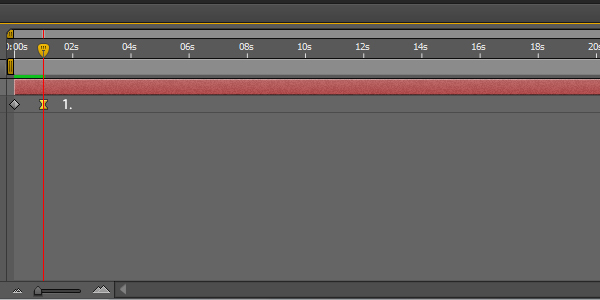
Now we will set our first Keyframe. It holds the information about the adjustments we made at this point (Frame 1, 0 sec). You can animate all of the Controls we discussed so far. To set a Keyframe you need to click on the Stopwatch. This creates a Keyframe, a yellow diamond.Keyframes – 2nd Keyframe
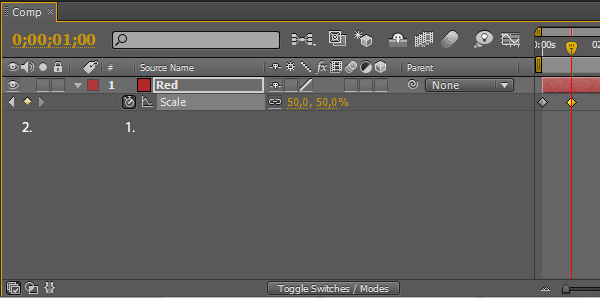
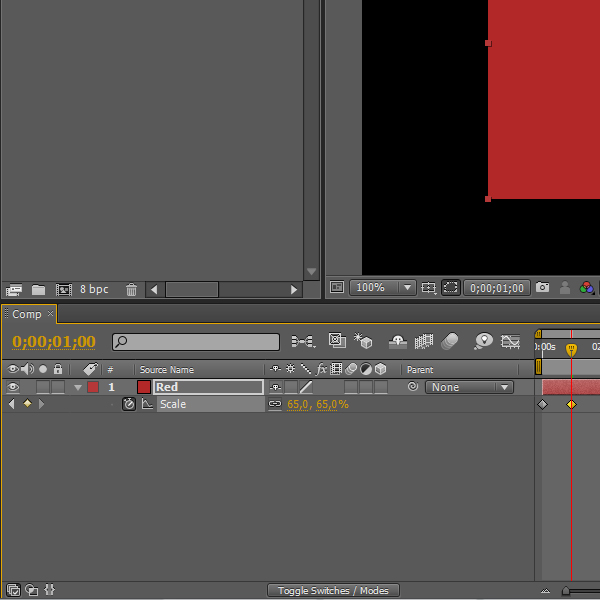
Grab the orange CTI (Current Time Indicator) and drag it to 1 sec. Once you change the values After Effects will create a new Keyframe. Another way to create a new Keyframe is by clicking on the diamond on the left side (2.) and not on the Stopwatch (1.). By clicking on the Stopwatch all the Keyframes will be deleted.Keyframes – 2nd Scale
Now change the Scale value to 65%.Keyframes – First Shape
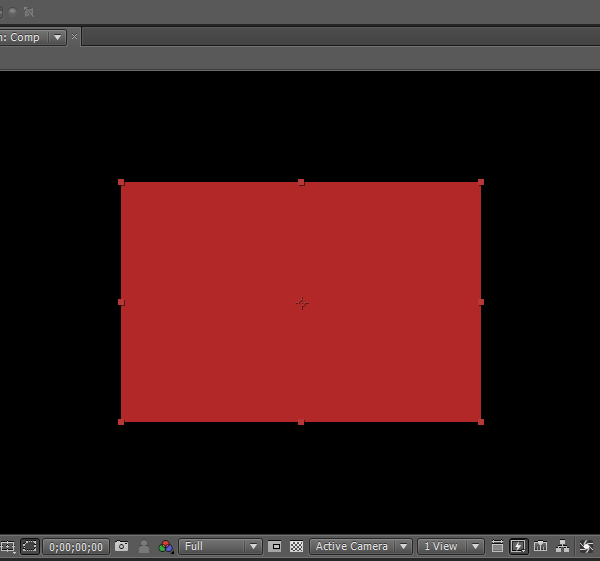
This is our Rectangular Shape at 50% at the beginning of our Timeline.Keyframes – Second Shape
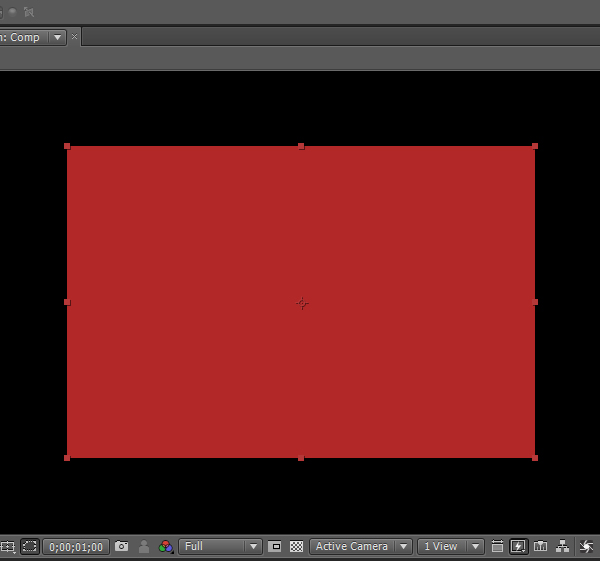
This is our Rectangular Shape at 65%, at 1 sec.Keyframes – Easy Ease Keyframe
A very interesting assistance of After Effects is the Easy Ease Keyframe. By choosing it the animation will come to a smoother end. It will slow down a little bit before stopping at the new size or position. You can either select a Keyframe and hit the Shortcuts or you can Right-click > go to Keyframe Assistant > Easy Ease. You can also choose between Easy Ease In or Out.Keyframes – Easy Ease Keyframe Symbol
When selecting Easy Ease Keyframe the little diamond will change its appearance to a symbol similar to a sand glass.Parenting
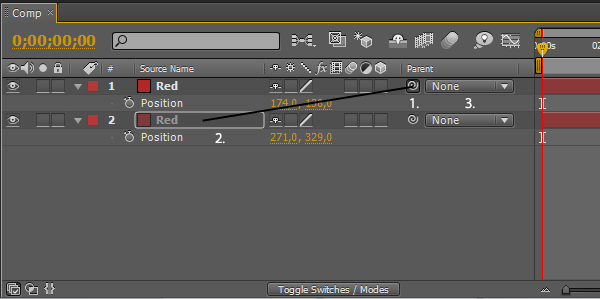
A very cool and useful feature is the Pick Whip. You can select it and drag the line to another Layer, value or other controls (1.). This process is called Parenting. It defines the Layer you choose as the Child (2.) of the Parent, in this case the Layer above. You can also select a Layer from the Drop Down Menu (3.) on the right side of the Pick Whip.Parenting – Example
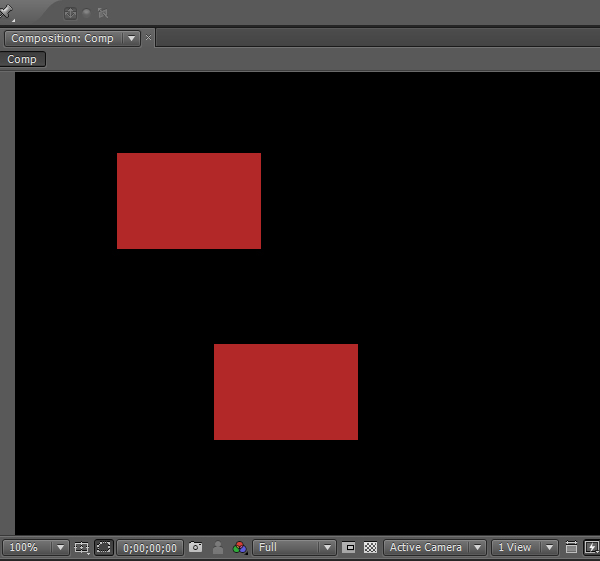
A second ago we parented our two red squares to each other. The upper square is the Child and the lower square is the Parent. When we change the position of the lower square the upper square will imitate our changes.Parenting – Example
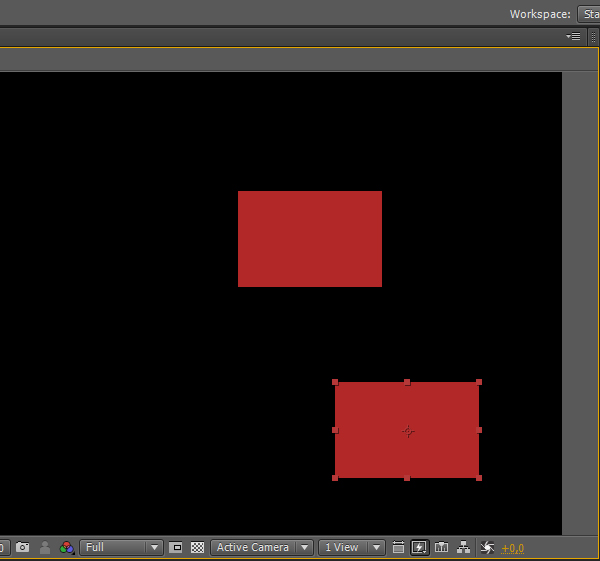
Change the position of our square to the right of our composition and watch what happens. Make sure you select the lower square since its the parent. If you select the upper square you won’t see the parenting effect we want to achieve.Motion Blur
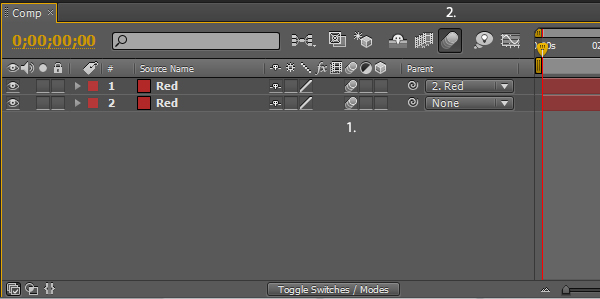
Most of the time when creating animations they look too sharp and not flowing. Therefore we have a very important feature called Motion Blur. You can select Motion Blur for each layer seperately (1.) and then enable (2.) Motion Blur for the whole composition. By combining the Easy Ease Keyframes and Motion Blur your animations will appear very smooth and flowing.3. Keying
We use Keying to composite characters on different Backgrounds. Each time you want to record footage including a person you should use a Green Screen. There are three different Screen types: Red, Green and Blue like the RGB-Colors. Since the human skin contains Red tones it’s not a good idea to use a Red Screen because of the low contrast. What After Effects does is, it selects all the green tones in the footage and makes them transparent. There are a few built-in tools which we will talk about in a second.- Built-In Keying tools
- Garbage Mask
- Preview Panel
- Keying Example
- Other Keying tools
After Effects Keying tools
You can find the Keying tools in the Effects & Presets Panel or by clicking on Effect > Keying or any other way we’ve learned so far. I listed some of them below:- Color Difference Key
- Color Key
- Color Range and
- Keylight
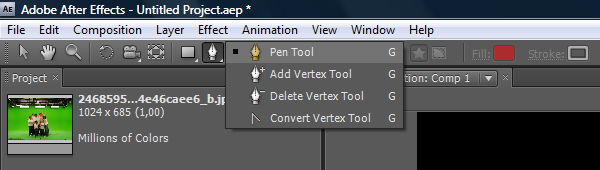
Garbage Mask – The Pen Tool
Sometimes its useful to create a garbage mask before keying the footage. This is a Mask which makes the keying process easier. By creating a Garbage Mask we cut out some obvious objects which interfere with our scene. In the next section you’ll learn how to make Masks with the Shape tools but this time we want to use the Pen Tool which is also available in After Effects. Select it from the Toolbar and let’s get started.Garbage Mask
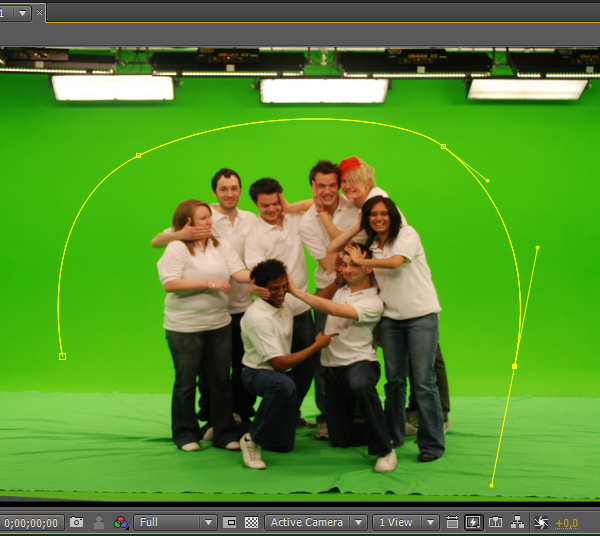
After selecting the Pen Tool we start to draw a shape around the characters we want to keep visible. As you can see there are the lights at the top and some cuttlings at the bottom which we can easily cut out with our garbage mask. You have to be careful to make the shape big enough since the characters will often move and the mask could interfere with the characters. You can make it either big enough or you can animate it using keyframes.Garbage Mask 2nd
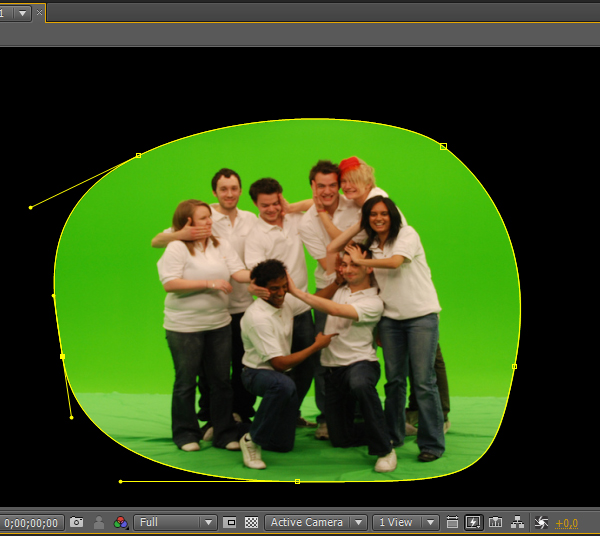
After you complete the Shape everything outside our Garbage Mask will be covered by Black which means it will be transparent. You should preview your Footage to make sure the characters are visible during the whole scene. You can render and watch the whole clip but you can also play it Frame by Frame.Preview Panel
At this point I want to bring in a very important panel which you will use all the time, the Preview Panel. I’ll shortly explain how it works. I think all of you know what the buttons do but some of them are interesting and not obvious at the first moment. The button on the far right is the Ram Preview Button (2.) which renders and plays whats on the Timeline. The Button right next to it on the left side is the Loop Button (3., 4. and 5). You can choose between Loop, Ping Pong and Play once. The Resolution affects the rendering process. You can change the resolution which makes rendering and previewing faster. If the resolution is set to Auto (7.) it will consider the information of resolution given below the Composition Panel (8.).Keying
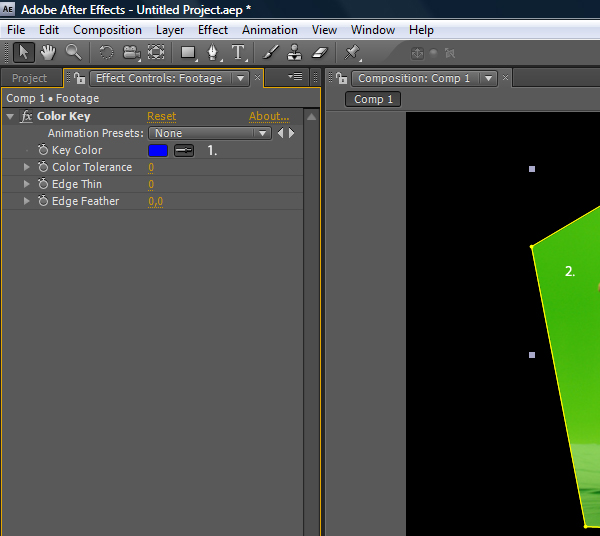
I’ll explain shortly how the Color Key Tool works. Unfortunately I don’t have Keylight at the moment. It is the most powerful Keying Plug-In which comes with After Effects. Normally it should be in the Effects Panel but if not you can install it at a later time. To start keying select the Layer go to Effect > Keying > Color Key. As you can see the Effect Controls Panel opened. Select the Eyedropper (1.) and click on an average green area (2.) to set the Key Color. After clicking on the Green Screen After Effects will start to cut out the green area. To improve the cut out you need to play with the values in the Effect Controls Panel. By playing with the Tolerance and Edge values you can achieve a good outcome.4. Masks, Transfer Modes & Transparency
- Masking
- Mask Settings
- Transfer Modes
- Transparecy
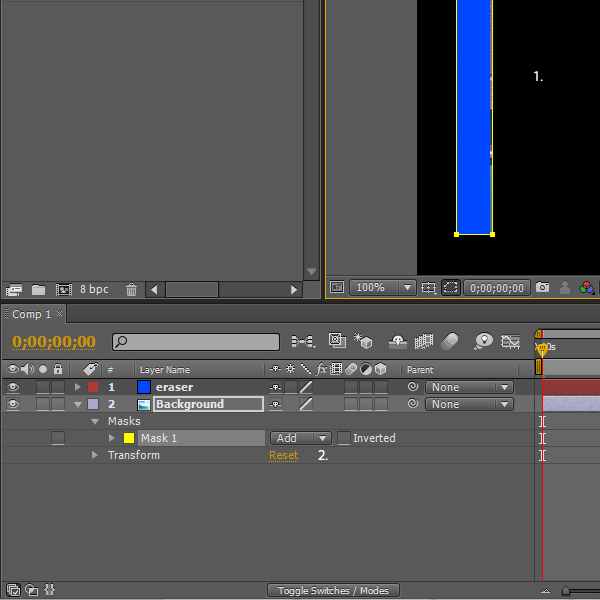
Setting up Composition
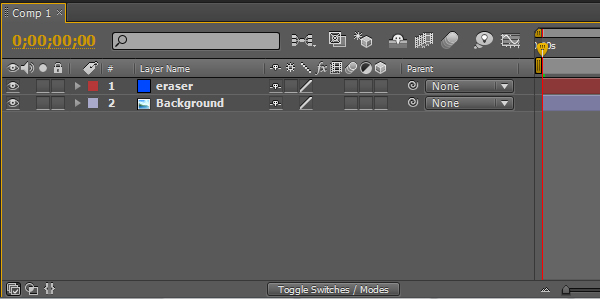
I prepared a composition with two Layers. The first Layer is a Shape Layer called eraser and the Layer below is the Background which is an image of a city skyline I found on sxc.hu. You can go ahead and create a composition with a Background you like and a Rectangular Shape. A little tip at this Point: If you select a layer you’ll create a Mask but if you don’t select any Layer you will create a Shape Layer. In the next step you’ll see how the arrangement looks like.Composition Arrangement
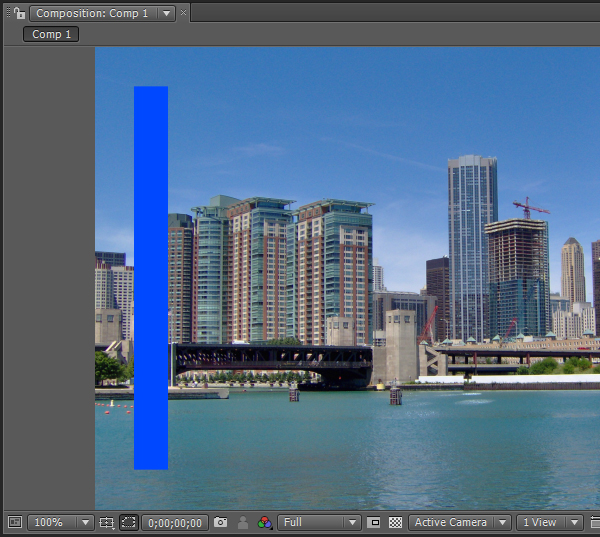
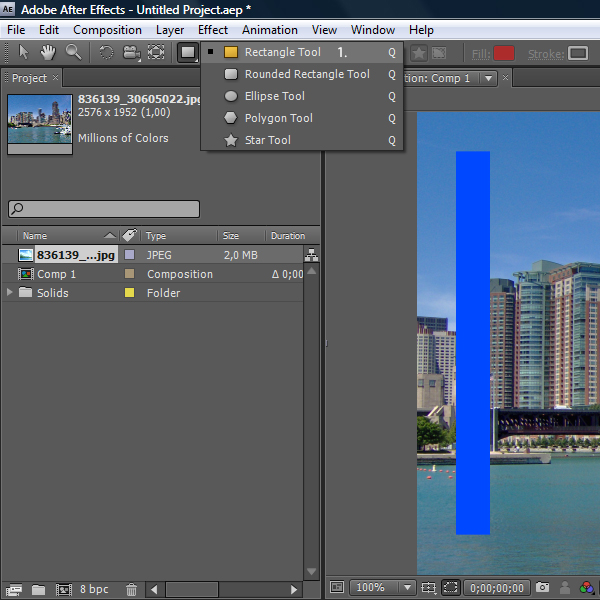
The Rectangular Shape is arranged on the left side above the Backround Layer.Mask – Rectangle Tool
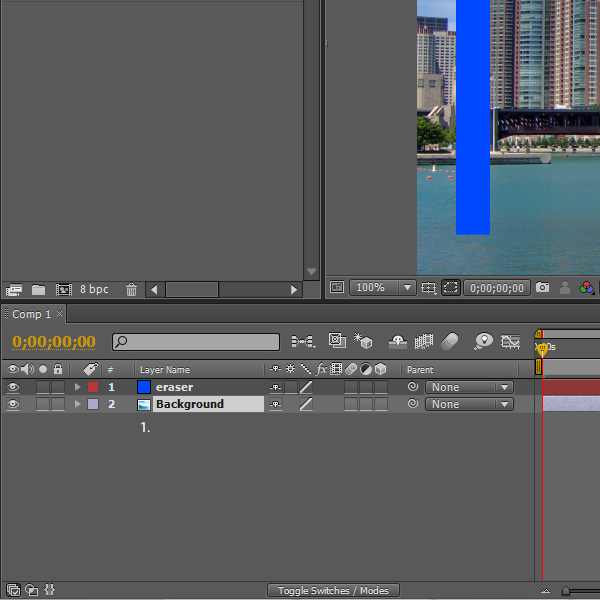
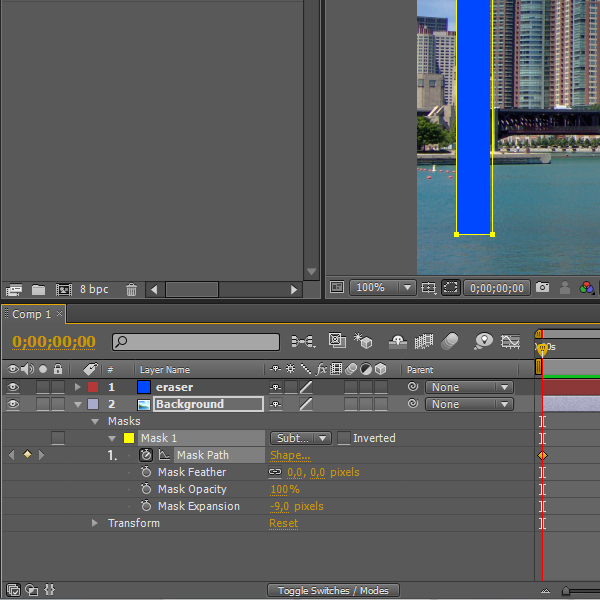
Select the Background Layer and go to the Toolbar. Select the Rectangle Tool or hit Q until the Rectangle Tool is selected. Now select the Background Layer to create a Mask and draw a Rectangular Mask approximately the same size such as our Shape.Mask – Mode
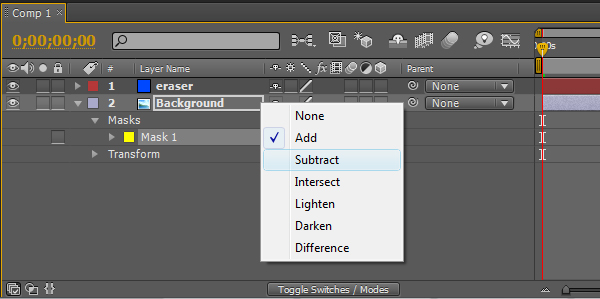
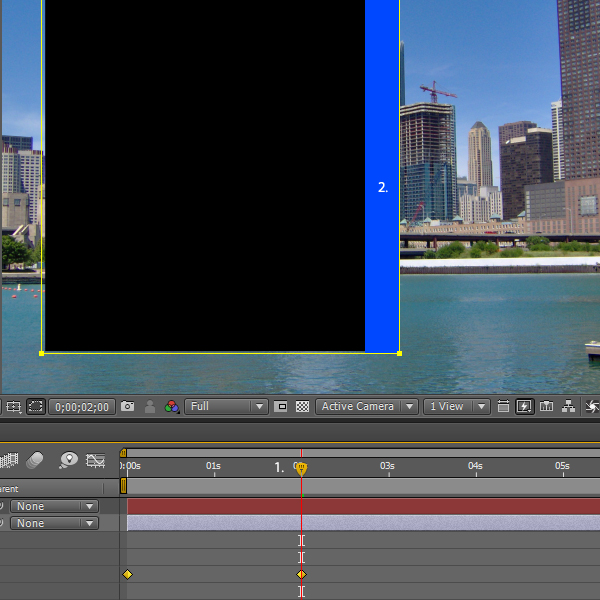
Our Background image disappeared (1.). Only the Mask Shape you created will let us see whats on the Layer. Shortly after you let your mouse go the Mask controls will pop up. You can also click on the little triangle or hit the letter M. By changing the Mode from Add to Subtract (2.) we’ll achieve the effect we want.Mask – Controls
Now we can see the Background except the area where our Mask Shape sits. Our Mask Shape was a little bigger than our blue Shape. the Mask expansion control expands or shrinks the Mask. I set it to -9 pixels (1.) to hide it behind the blue Shape (2.).Rectangular Shape – Animation
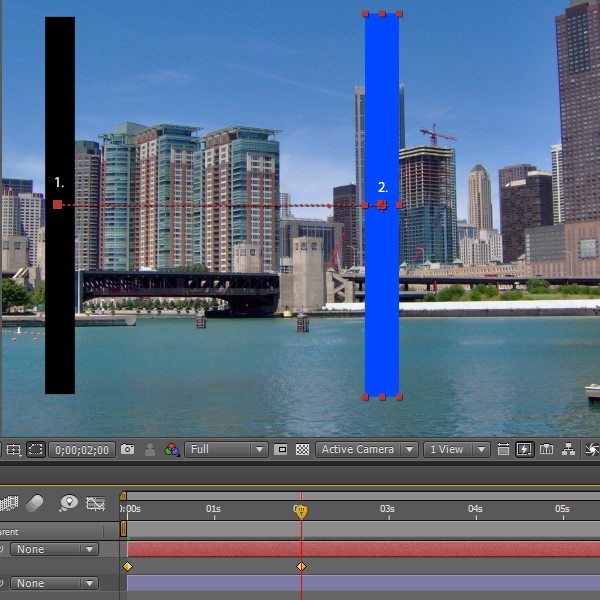
Now set a keyframe on the beginning of our timelime, move the CTI (Current Time Indicator) to the right (2 sec). Select our blue Shape and move it from the initial position to the right. By holding Shift you’ll be able to move the Shape in a straight line.Mask – Animation
After animating our blue Shape we want to animate our Mask. Since we want to create an eraser we want to hide everything our blue Shape passes over. Go back to the first Frame, set a Keyframe at the Mask Path (1.) and go to the second position at two seconds.Mask – Shape size
When approaching the Mask Shape your mouse will change to a black cursor. Double-click > select the side and drag it to the right until the blue Shape hides it again (2.). Double-click again to save the new Form. Preview our little composition to see what we’ve created. The eraser should delete the Background image while it moves to the right. Done. This effect is very simple but you can use this simple effect to create interesting compositions.Mask Controls – Ellipse Tool
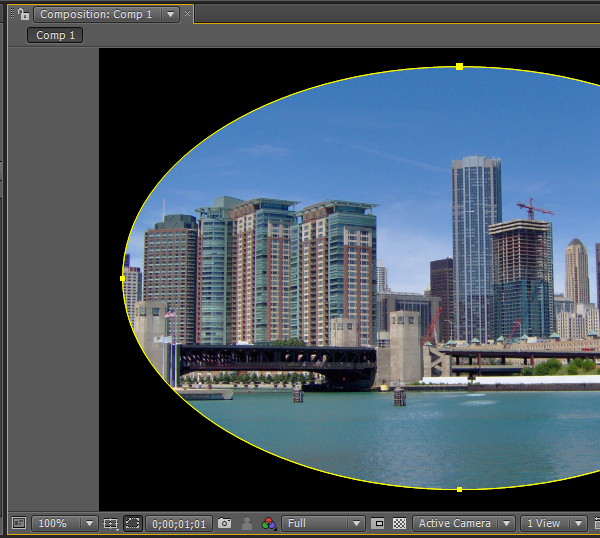
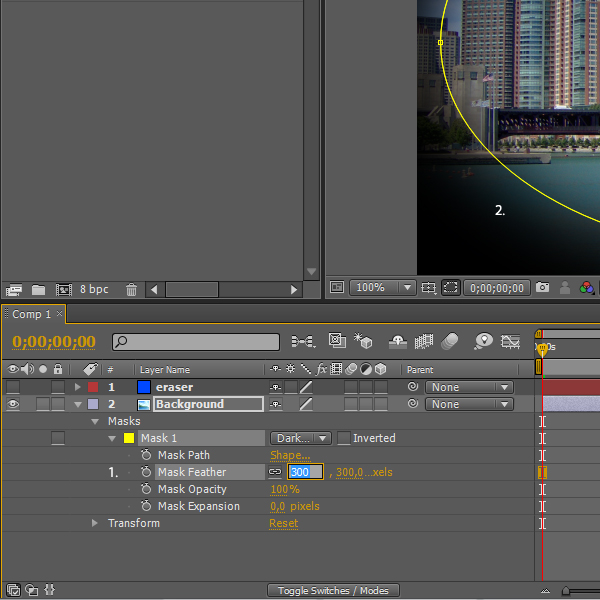
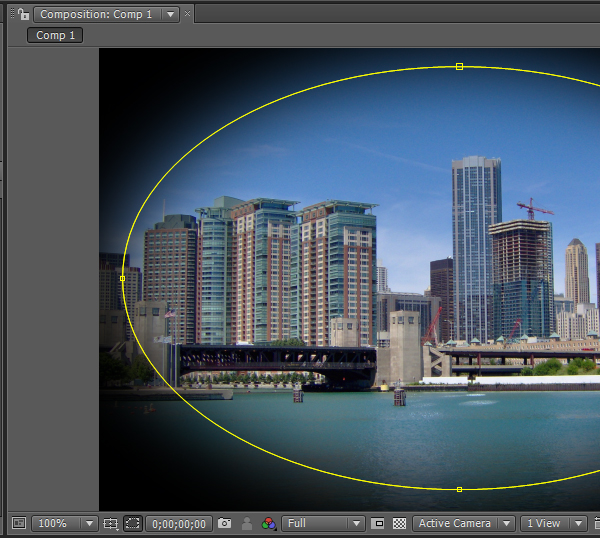
You can use Masks to create the cool shades at the corners by selecting the Background Layer > choosing the Ellipse Tool and creating a Mask Shape.Mask Controls – Feather
We already changed the values of the Mask Expansion but this time we want to change the Mask Feather (1.). This gives us the Gradient from Black to Transparent (2.).Mask Controls – Overview
This is how it will look like. It’s a little bit overdone but you can adjust it to your needs.Transfer Modes
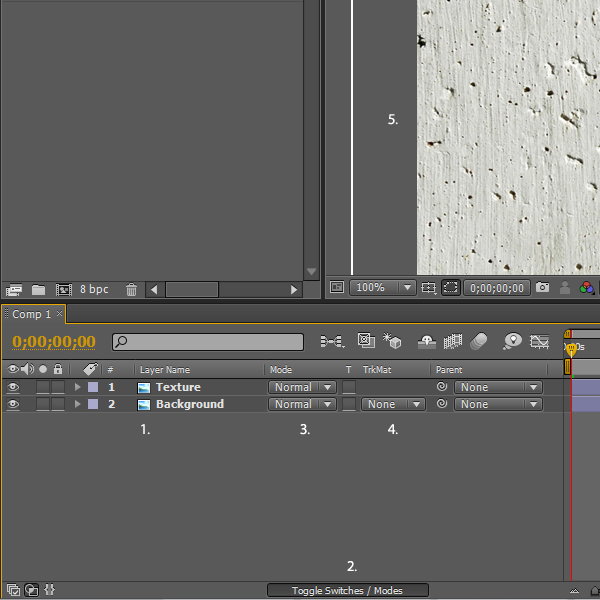
I imported two images to a new composition. The first image is a texture which I downloaded from the Freebies section from PSDTUTS.com and below I placed the city skyline Background (1.). Now we want to change the Transfer Mode, respectively Blending Mode as we say in Photoshop. To do that we need to Toggle the Mode (3.) and Track Matte (4.) Dropdown Menus. Either click on the Button: Toggle Switches / Modes (2.) or hit the key F4. The Wall texture is 100% opaque and since After Effects works with layers we can only see our texture and the background is hidden.Transfer Modes
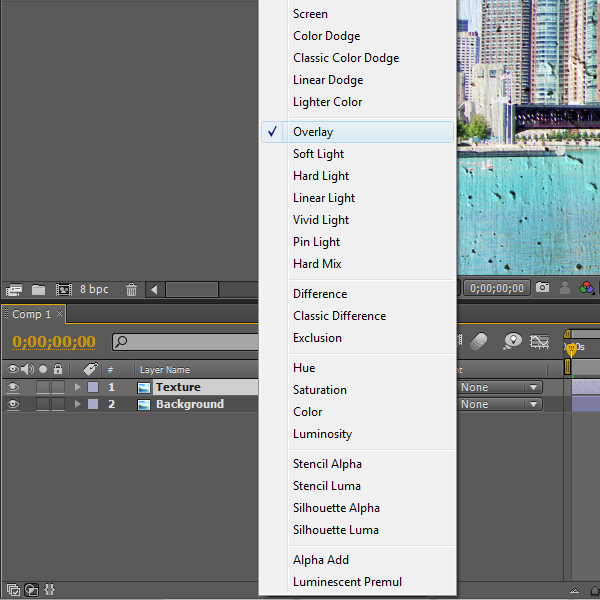
Click on the little triangle to open the Transfer Modes and choose one you like. The most common Transfer Modes are Multiply, Overlay, Screen and a few other. You can try them out and take a look at what they do. Multiply would hide everything black and show through the areas where it is white, Screen the opposite. In our case we did a little mixture choosing Overlay.Transparency
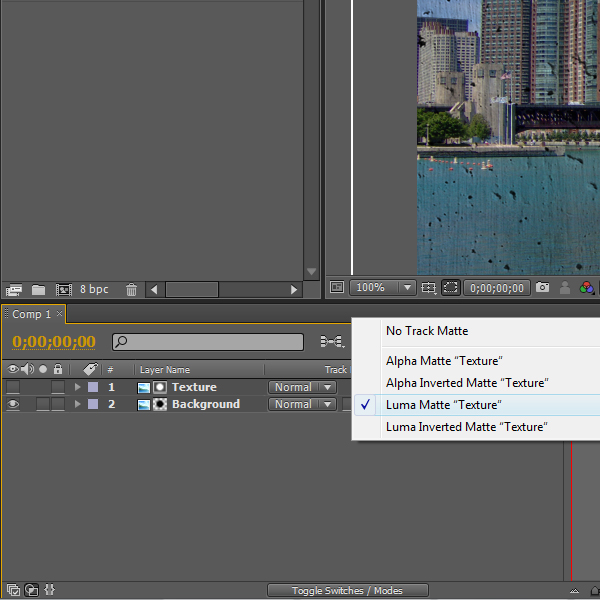
The Track Matte allows us to add Transparency to a Layer which doesn’t already have a transparent Track. If you want to check whether your image has transparent areas or not you can click on the Transparency Switch in the Composition Panel noticeable by the chessboard-like button. By setting the Track Matte it will use the Layer above it as the Transparency Source. Choosing Luma Matte will make the black areas transparent and the white areas will show through.Transparency
By choosing Luma Inverted Matte the opposite will happen. This time the white areas are transparent and the black areas are showing through. Feel free to try out the Alpha Matte and Alpha Inverted Matte.
No comments:
Post a Comment