
AE - Tutorial
After Effects CS4 – Essential Training
Introduction
Before we get started, let’s take a look at what we’ll be facing in the Essential Training series which is intended to teach all beginners the basics of After Effects.In this first part of the extensive and hopefully useful Training we’ll learn many features of After Effects CS4. The three sections in which I split this Training, are:
- Part 1 – Getting Started
- Part 2 – Effects & Animation
- Part 3 – Advanced techniques
Part One – Getting Started (Video Toturial Here)
In this section we will go over, how to import and organize footage, create new compositions, how to handle all the adjustment and project settings and how to save and export our projects. In the chart below you can see a listing of the steps explained in this Tutorial:
1. Interface
Before importing any footage, creating a composition or explaining any features of After Effects we’ll need to open After Effects. After that Iíll start showing you the interface. There are three main fragments:- Menu bar
- Toolbar
- Panels & Frames (Standard)
Menu bar
At the top-left-corner you can see the menu bar. The menu bar is similar to all other menu bars in different programs. Some features are stored in the same menu items as in other Adobe products. I numbered the menu items to say one or two words to each of them:- In the second part of this line you can see the currently open project file name.
- Here you can open, save, import and export your projects and files.
- An important feature in this section is the preferences area and of course all the undo, redo and editable features.
- We’ll use this menu item to create a new composition but you should definetly check out the other features listed in this section.
- As many other Adobe products After Effects works with layers. You can use this to create, edit or arrange your layers.
- Similar to Photoshop you can choose and edit your effects and presets from here.
- Since we want to create animations in After Effects you should check out this menu item and explore all the features in here.
- Everybody who already worked in Photoshop knows that rulers, grids and guides are very useful. Here you can find them.
- Later in this tutorial I’ll talk about panels, frames and workspaces. Here you can enable or disable the panels.
- As a matter of course this Tutorial doesn’t cover all the functions and features After Effects is capable of, so you should check out the Help file for more information.

Preferences
If you want to change the appearance of After Effects you can go to Edit > Preferences > Appearance and then change the Brightness. If you have any problems with the performance you can change some memory settings and optimize After Effects to your needs.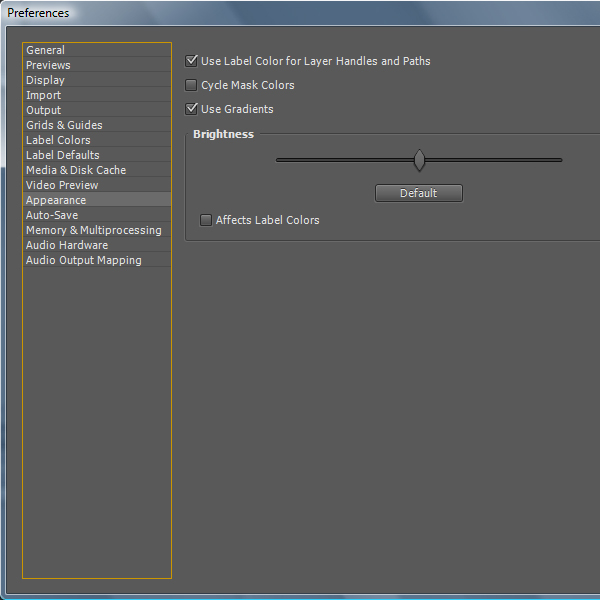
Toolbar

Panels & Frames (Standard)
When starting After Effects for the first time the Workspace is set to Standard. The After Effects Workspace consists of many Panels (1.). Every Panel has its own name and function. As you can see in the image below there is an Info, Audio, Preview and Effects & Presets Panel. All Panels are separate except the Info and Audio Panel. In case two or more Panels are connected they are sitting in a Frame (2.). You can pick a panel and move it to another panel to combine them to a Frame. We’ll talk about that throughout this training.
2. Footage
- Import possibilities
- Organizing footage
- Search footage
- Right-click options
- New Composition & Project Settings
Import possibilities
Before creating a composition which holds our media like videos, images or audio files, we need to import those files to our project which you should always save after the first changes. Create a new ProjectFile > New > New Project and save it using File > Save As. Now that you’ve named and saved your project we’ll learn how to import our files. There are several ways to import them to the project window.
- File > Import > File
- Ctrl+I
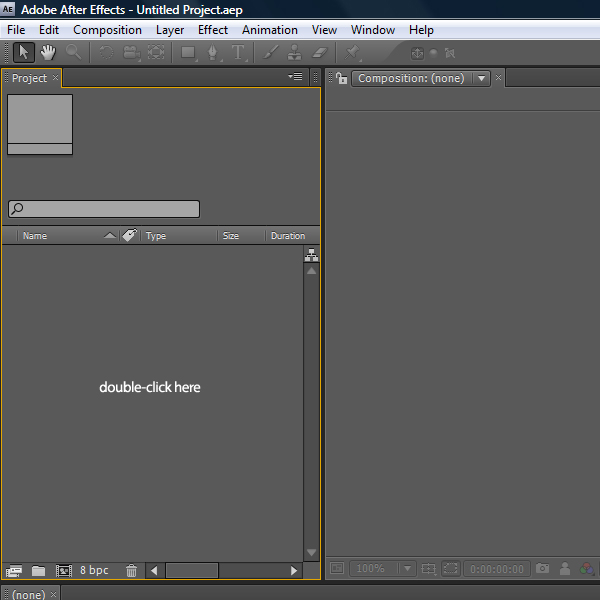
- Double-click on the project window
Importing single or multiple files
Use one of the possibilities listed above to import a new file. The Import File window appears. Now you can select single or multiple files and import them by clicking Open.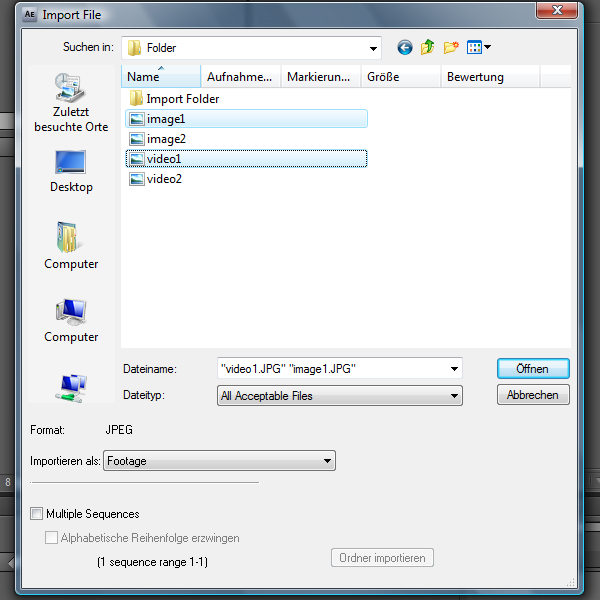
Import folders
After Effects is also capable of importing folders which contain acceptable files. Select a folder and then click on Import Folder (1.).
Project Window
Now our files are imported to our Project Window. The files are ordered by name. As you can see After Effects gives us information about the name, file type, size and more.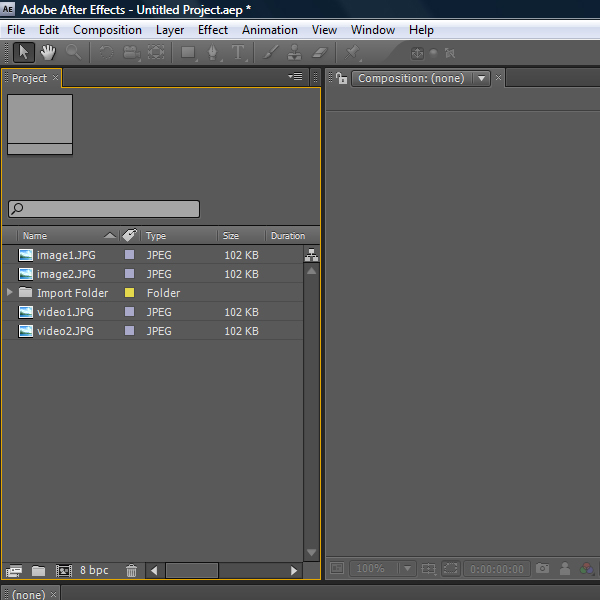
Renaming files
You can change the name of any file listed in the project window by clicking on it and pressing the Return key. Changing the name in the project window does not change the files real name. The original files aren’t imported to our project, they are just linked. I’ll talk about this later in the course of this tutorial.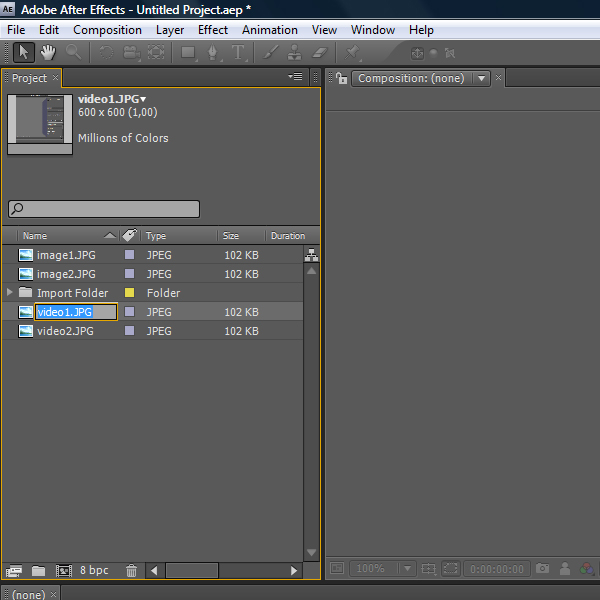
Organizing
Keeping the project organized is very important. Unless you are working on very short projects with just a few files its ok but as soon as the project is getting extensive it is very important to keep everything organized and named. When working with co-workers you want them to be able to understand what you’ve done so far. To do that you can create Folders (1.) where you can store your files.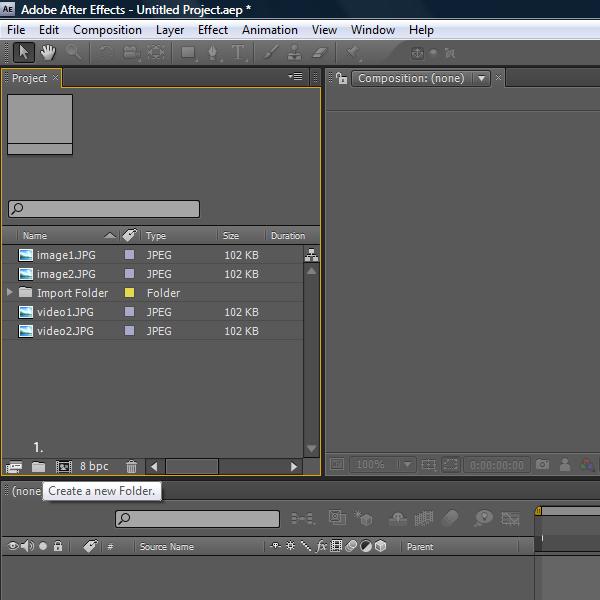
Moving files
You can select single or multiple files in the project window and move them to a folder.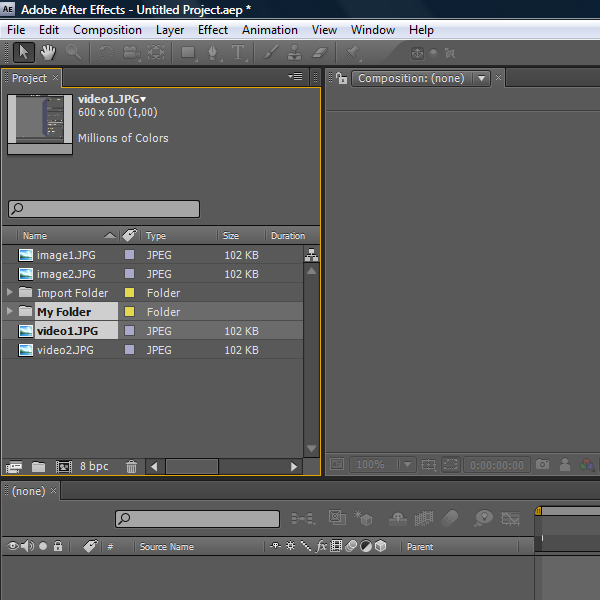
Hiding files
The files stored in a folder can be hidden by pressing the little triangle which collapses the folder they are in.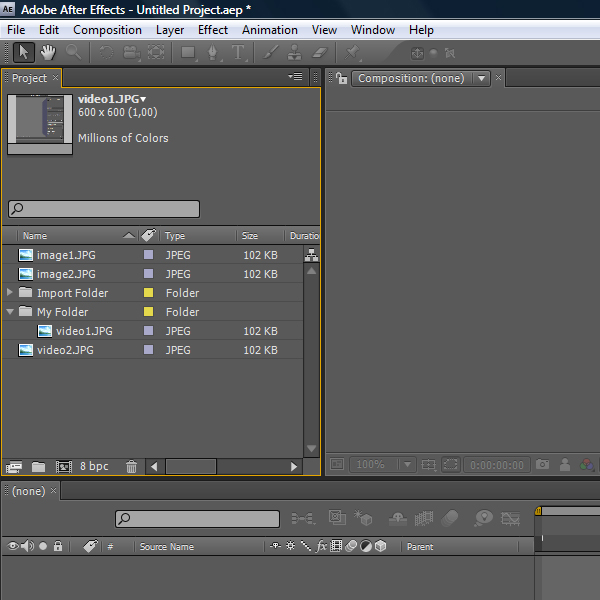
Searching files
Since our project doesn’t contain many files it is manageable. Once we have many files it gets unclear which means we need to search for a file. The best way to do this is using the search bar. Type in the file you are looking for and as you type in After Effects sorts out the files which contain the same letters.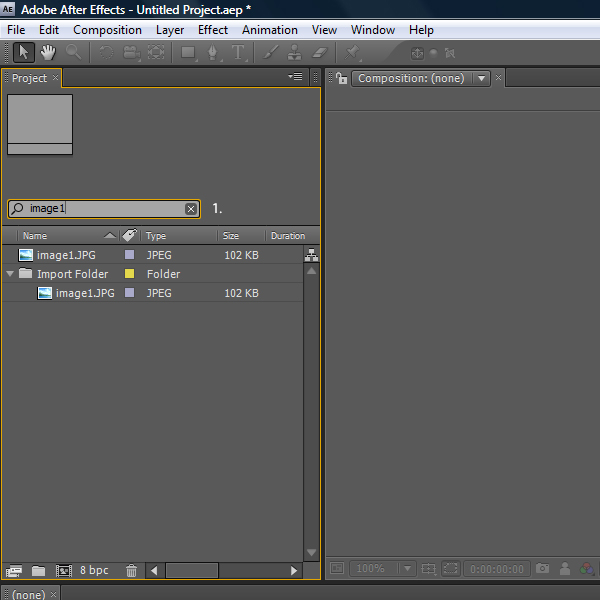
Right-click Options
You should always right-click anything to explore the capabilities of any product. In After Effects there are some interesting features like being able to replace a file with another updated version of that file. After Effects will keep all settings and replace the old one with the new one.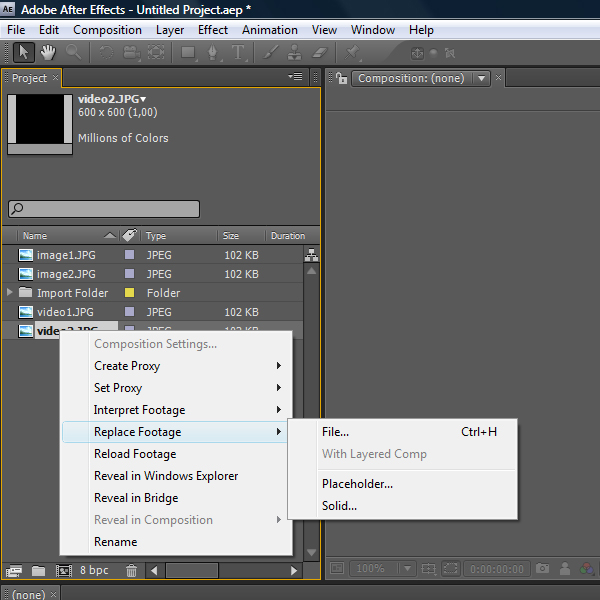
Create a Composition
We imported our files and now we have to create a composition which will later contain our files. To do that you can either click on the button (1.) and then changing the composition settings by clicking on the button next to it (2.) or you can go to Composition > New Composition.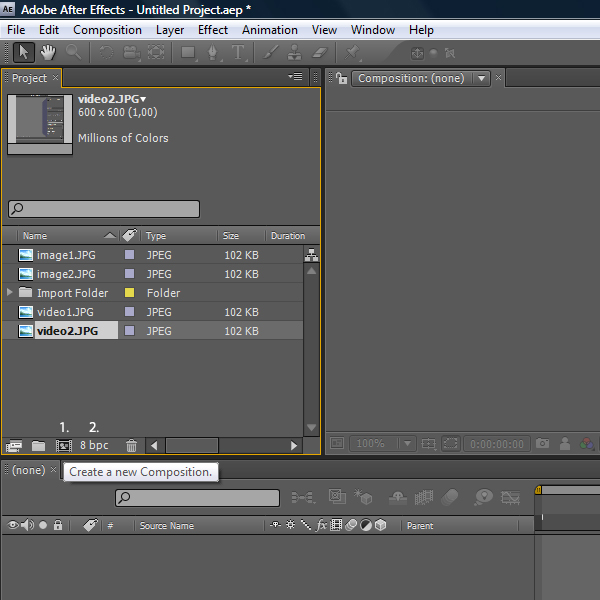
3. Composition
- Adding footage to a composition
- Adjustment & Project Settings
- Pre-comp
Composition Settings
When creating a new composition by going to Composition > New Composition the Composition Settings will appear. You can change the Size of the composition, the type of Resolution, Aspect Ratio, Frame rate, Duration and so on. In the Advanced section you have a few extra options. Apart from your projects you should try out different settings to see what they look like.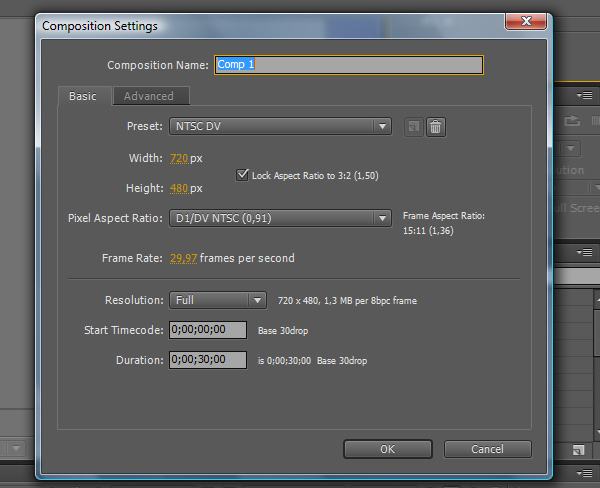

Adding footage to composition
There are several ways how you can add footage to your composition or Timeline. You can drag & drop your files from the Project Panel to the Composition Panel (2.), the Timeline (3.) or to the area where the layers are sitting (4.). When dragging & dropping a file to a certain area named above After Effects creates a composition itself but I think it’s better to create a composition (1.) and then add files to it since you have more controls.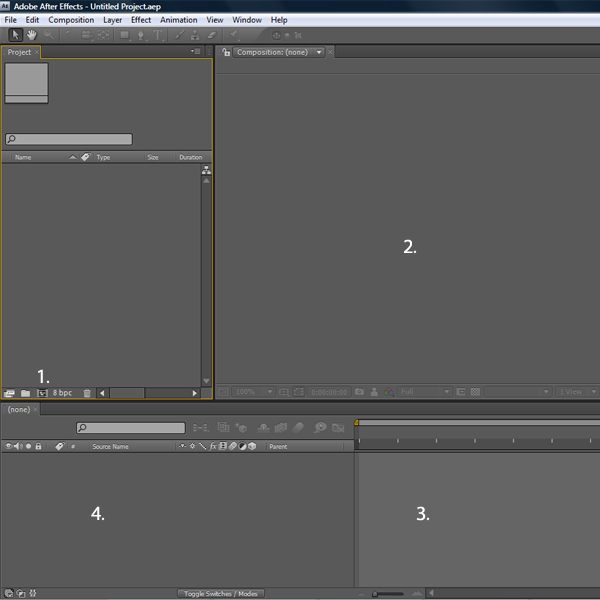
Pre-comp
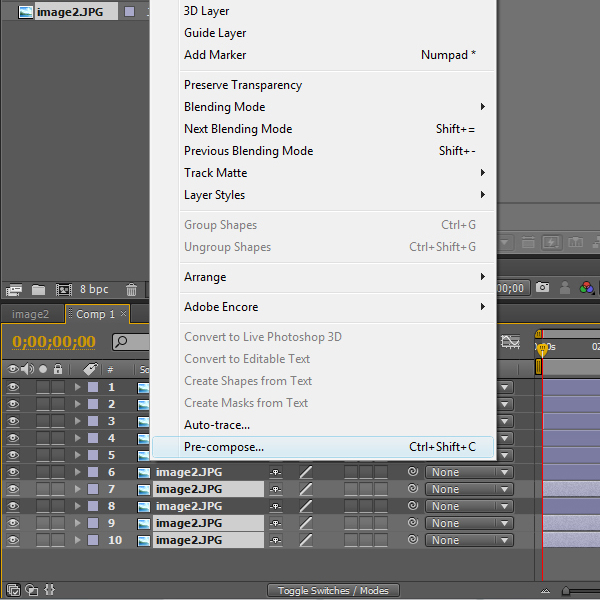
Pre-comp is a terrific feature of After Effects and one of the various reasons why you should use this feature is that it simplifies your main composition and makes your work more effective. There are many considerable advantages when using the Pre-comp function. Imagine how effective it would be to create a master movie clip with a complex composition which you can use in multiple locations throughout your main composition. Now let’s talk about the different operations of Pre-compositions.Pre-comp Options
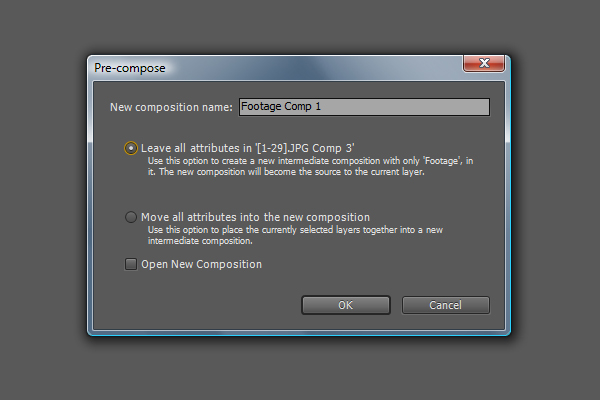
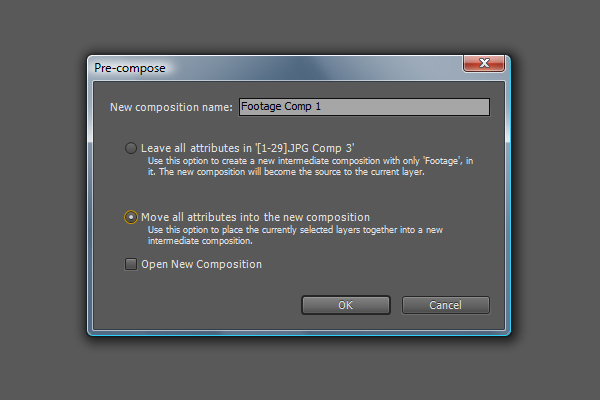
You can select single or multiple layers and create a Pre-comp by going to Layers > Pre-Comp or by usingCtrl+Shift+C. The Pre-compose window will appear. When that happens you have two different options and one extra checkbox.
- Leave all attributes:This creates a new composition which contains only the source file and leaves all effects, masks and other changes applied to the Pre-comp layer.
- Move all attributes to new composition:This creates a new composition which creates a duplicate of the master composition and moves all applied effects, masks and other changes to the new composition.
- Open new composition:By checking this checkbox After Effects will open the recently created Pre-composition. The new composition will dock on the Panel where the other compositions sit. You can also Alt+double-click on the Pre-comp Layer to open the new composition.

4. Projects, Save and Export
- Information about Projects
- Saving possibilities
- Export composition
Project Files
When we create a project and save it, all of our work is being saved in a Project file with the file extension .aep which is a shortcut of After Effects Project. This file keeps track of everything we do in After Effects. As mentioned before when we bring in files to the project panel the files won’t be stored in the project, the original files are only linked to our project. This means that we have to be careful with the original files and their directories where they are stored in. When we move the files, rename them or delete them we won’t be able to complete our project. The benefit of this, are the low After Effects Project File sizes. Since you can’t work on two projects at the same time you always need to save the project when switching to another one.Saving Projects
A good habit is to save in short intervals. There is a possibility to let After Effects save in given intervals. To do that go to Edit > Preferences > Auto Save. Here you can set the interval and the project variations till it overwrites the first file. Another cool function in After Effects is File > Increment and Save. By clicking this saving method After Effects will save your current file as Filename_01.aep and the next time it will save a new copy called Filename_02.aep. This way you can always go back if the project isn’t going in the direction you like.
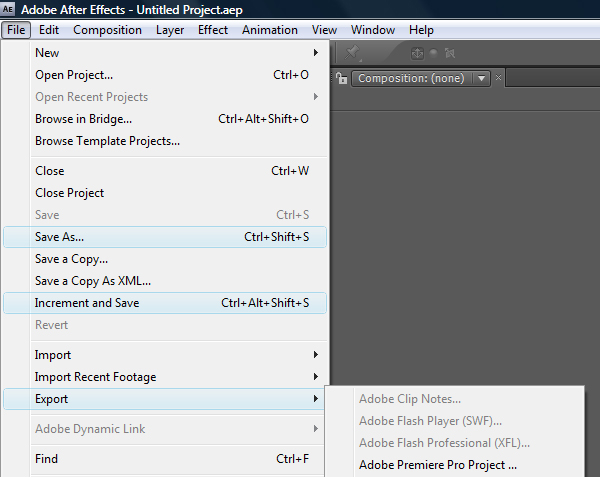
Export Composition
There’s 2 ways to get your project exported or rendered. To Export your project go File > Export and choosing the File type. Choose this method if you wish to output to any of the formats available in this menu. Otherwise, the best way to export your projects is to render them using the render queue. You can “queue” many compositions to queue at once then let After Effects process or “render” them all at once. Rendering time can vary from a few seconds to many hours depending on the complexity of your compositions.5. Render
- Render Settings
- Output Module Settings
- Compression Settings
Render
The last step when working in After Effects is rendering the movie you’ve created. As mentioned above you can use the Export function but now I’ll explain the Render Queue. Other than the Export function the Render Queue gives us total control of our composition we want to render. In this section we’ll talk about the different settings and options we can modify, codecs and types of media.Add to Render Queue
I memorized the Shortcut Ctrl+Shift+/ of the Render Queue since this way I can find it very fast. But you can also go to Composition > Add to Render Queue. Make sure to select a composition.
Render Queue Panel
After selecting the Render Queue the proper panel will appear somewhere in your workspace. Normally at the bottom where the composition Panel sits. You can retrieve information about the current settings of your composition by clicking on the little triangle next to Current Render (1.). As you can see we have three fragments which are modifiable before rendering the movie. You can set the Render Settings (2.), Output Module (3.) and the directory where you want your files to be saved (4.). The Output Module is the main fragment we will take a look at since this is where we tell it what settings to use.
Render Settings
To change the Render Settings you need to click on the text in orange. By clicking on the dropdown menu you only select which Settings you want to use. Usually Best Settings is the best choice.
Output Module
The Output Module works the same way. You can select the Output Module by clicking on the triangle next to the orange text which would open the actual settings window.
Render Settings window
After clicking on Render Settings the Render Settings will appear and you’ll have a few options to modify. For the most part the settings are self-explanatory. We’ll leave the settings for now.
Output Module window
By clicking on Output Module the Output Module Settings will appear. This is where we will make some changes. For example change the Format to QuickTime Movie (1.). At the bottom you can also enable audio rendering by clicking on the checkbox Audio Output and modify some settings.
Formats
While we want to select the Quicktime Movie format you can see that there are plenty of formats which contain the word Sequence. That means the movie will be based on still images. You should always consider what you will use the movie for. For example Adobe Flash Video is good for web usage. You can render your movies to DVD, CD, FLV, SWF and more:
Compression
After choosing the format you like, the Compression Panel will appear. Compression (codecs) is very important and you need to be careful when choosing one because the codec you use to compress your files will be the same codec your viewers need to decompress your footage, to watch it.
Codecs
This dropdown menu can vary on different computers. Different DVD Player softwares install their own codecs like Divx. You can go with Animation if you can work with big file sizes. An interesting compression type is Photo-JPEG which renders your movie in JPEG images. You can change the output quality with the slider. Its not necessary to set it to 100%. To reduce the output file size you can set it to 90%-100% achieving good results.
Output To
To set the directory where you want your files to be saved you have to click on Output To (1.). The proper window will open where you can select the directory, give the file a name and click save.
Render
After setting your Render Settings, Output Module and the directory where you want to save your files to, you are ready to render your movie. Click on the Render button (1.) and the rendering will start.
Rendering process
You can see the File name (1.) and the rendering process (2.) in form of a orange bar. You will hear a beep when the rendering process is done.
No comments:
Post a Comment